 Figure 1. The Fuzzy Clustering
Applet's First Screen
Figure 1. The Fuzzy Clustering
Applet's First Screen
1.0 The Applet
2.0 Loading Image and Data Point Files
3.0 The Applet Controls
4.0 Running the Algorithms
5.0 Saving the Data Points
6.0 Removing Computed Shells and Clusters
7.0 Removing the Data Points
8.0 On Line Help
1.0 The Applet
Figure 1. The Fuzzy Clustering
Applet's First Screen
The Fuzzy Clustering Applet is a simulation tool useful in observing fuzzy logic algorithms while they attempt to locate groups of points in your data set. To run the applet, first you need it installed on a web server. Because the applet is written in Java, next thing you need a Java enabled web browser. Netscape's Navigator, or Microsoft's Internet Explorer will work just fine. In order for the applet load data from the user's computer I use a HTML form containing a File Selection field. This is a extension to the HTML language not supported by most browsers. In fact, to effectively run the applet I recommend that you use either Netscape's Navigator version 3.0 and newer or Microsoft's Internet Explorer version 4.0 and newer.
Figure 1 is the first screen of the Fuzzy Clustering Applet. Like it says on the screen, here is where the user can load data files into the applet. Figure 2 is the very next screen, the actual applet itself.
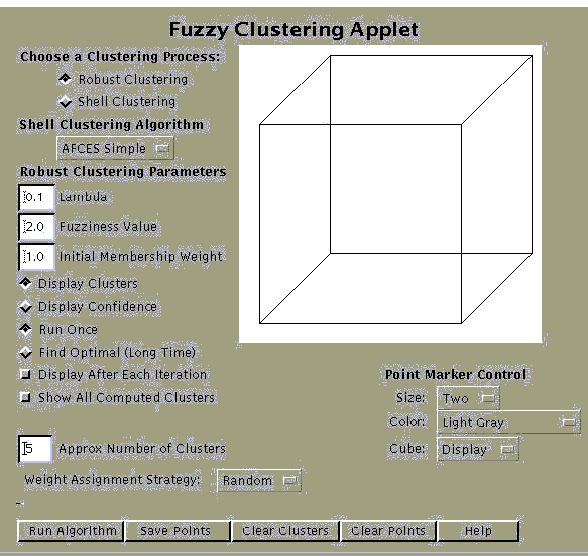 Figure 2. The Fuzzy Clustering
Applet
Figure 2. The Fuzzy Clustering
Applet
2.0 Loading Image and Data Point Files
To pass the applet your own data points, all you just have to do is create an ASCII file of the following format:
The format of this file is quite liberal. You can use any white space character, a comma, or even a newline interchangeably as field delimiters.
If you wish to load an image the applet supports gif and jpeg encoded image files. The plotting canvas is 300 by 300 pixels so remember to keep your images small.
To load a file into the applet you start with the first screen (see figure 1). Here are two fields: one for data point files and one for image files. You simply have to enter the name in the appropriate field on the form. If you don't know the name, select the browse button to search your local directories.
To start the applet select the Start Applet button at the bottom of the form. If you make a mistake press the Clear Form button.
Loading data files into the applet is not required to run the
applet. In figure 2, note the white square with a cube drawn
in it. This is the plotting canvas. This is where all the data
points are plotted. To enter your own points simply click the
left mouse button on the canvas.
3.0 The Applet Controls
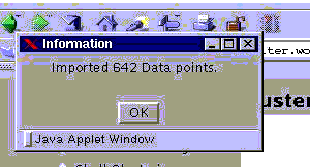 Figure 3. Load Points Completed
Dialog
Figure 3. Load Points Completed
Dialog
Figure 2 is the applet itself. If the user specified any data files from the first screen, they will now begin loading. When the loading of points completes, the dialog box of figure 3 will be displayed. Select OK to close.
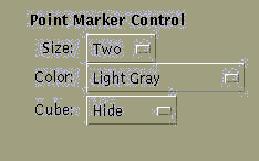 Figure 4. Point Marker Controls
You already know that the white square in figure 2 is where all points are plotted in the applet. To can change certain aspects of the plotting, use the controls of figure 4. To set the size of the data points in the plotting canvas use the Size controller. To change the color of the data points use the Color controller. For a three dimensional perspective you can display a cube or truncated cube using the Cube controller.
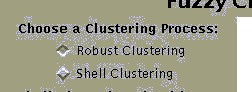 Figure 5. The Clustering
Process Control
Figure 5. The Clustering
Process Control
The Fuzzy Clustering Applet supports two types of clustering. Robust clustering and Shell clustering. The Robust clustering algorithm attempts to locate and color groups of points that are adjacent to a some computed coordinate, a cluster center. The Shell clustering algorithms, similarly attempt to locate groups of points but to encircle them instead. To select the clustering process use the controls of figure 5.
 Figure 6. Shell Clustering
Algorithm Choice
Figure 6. Shell Clustering
Algorithm Choice
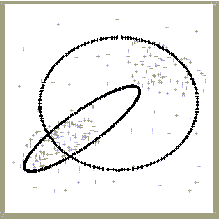 Figure 7. AFCES Simple
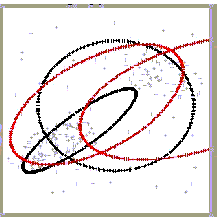 Figure 8. Simple & Newton
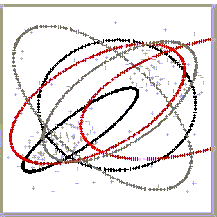 Figure 9. Simple, Newton
and U
Figure 9. Simple, Newton
and U
If Shell clustering is enabled you can choose a particular clustering algorithm to run using the controls shown in figure 6. The valid choices are: AFCES Simple, AFCES Newton, and AFCES U. The applet is designed so that you may compare the results of each of these algorithms. Simply select and run each algorithm in turn. The current results will be overlaid across the previous results (see figures 7, 8, and 9).
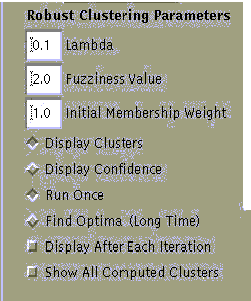 Figure 10. Robust Clustering
Controls
Figure 10. Robust Clustering
Controls
The controls of figure 10 are used if Robust clustering is enabled.
The first is the Lambda parameter. It is a multiplier factor
for the noise computation. Its value can be any real number greater
than zero. The Fuzziness parameter is an exponent for the weight
optimization function. Its value also can be any real number
greater than zero. The Membership Weight value is a percentage.
Therefore it must be a quantity greater than zero but not exceeding
one. This value is used as the initial probability for cluster
membership, that is assigned to a point.
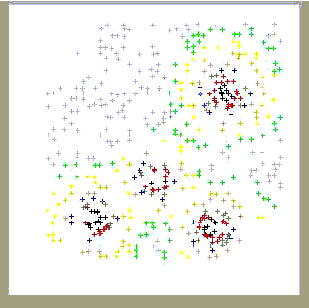 Figure 12. Display Confidence
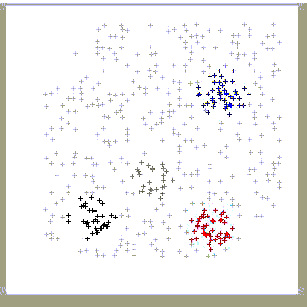 Figure 11. Display Clustering
Next are the radio buttons: Display Clusters / Display Confidence.
They are used when plotting clusters. If Display Clusters is
selected, the points that are members of a particular cluster
are all colored a unique color (see figure 11). If the Display
Confidence is selected, the points surrounding the clusters are
colored a unique color depending upon the probability that they
belong to that cluster (see figure 12).
The last group of radio buttons: Run Once / Find Optimal defines how the algorithm determines the number of clusters. If the first option is chosen, the algorithm will perform its computations using the given number of clusters. If the latter is chosen, the algorithm will first compute the optimum number of clusters, then compute the clustering. This process takes a significant amount of time.
The last two options: Display After Each Iteration and Show All Computed Clusters control plotting as well. The former tells the algorithm to plot all the intermediate results while continuing to compute. The latter instructs the algorithm to plot all the clusters computed, including those that fall below the noise threshold.
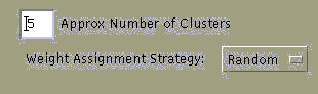 Figure 13. Controls for All
Algorithms
Figure 13. Controls for All
Algorithms
The last of the algorithm controls are shown in figure 13. These
two options are valid for all algorithms. The Approx Number of
Clusters field is where the user specifies the estimated number
of groups of points in the data set. The Weight Assignment Strategy
can be: alternate, random, or in order. This specifies the way
in which cluster membership weights are initialized for every
point in the graph.
4.0 Running the Algorithms
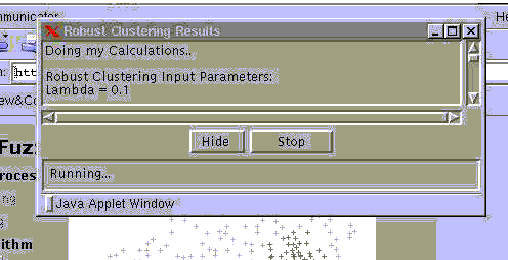 Figure 14. The Algorithm
Results Dialog (Running)
Figure 14. The Algorithm
Results Dialog (Running)
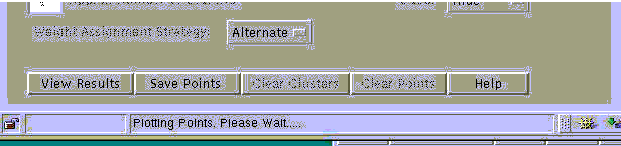 Figure 15. The View Results
Button
Figure 15. The View Results
Button
Once you have configured the algorithm controls you can start the computation by selecting the Run Algorithm button. When the algorithm starts the Results Dialog appears (see figure 14). Collected in the scrollable area of the dialog box is any textual output from the running algorithm. While the algorithm is active, the Results Dialog appears like in figure 14. If you select the Hide button, the dialog disappears from view. To restore the dialog press the View Results button (see figure 15). You can also stop the computation before it completes by pressing the Stop button.
When the algorithm has finished computing the Results Dialog appearance is similar to figure 16. To close the dialog without saving the text output press the Close button. To save the captured textual output select the Save Results button. Figure 17 is an example of a save output screen. This is a new browser window in which the all the algorithm output is collected. To complete the saving process, the user must select the save option from the browser's file menu, writing to local disk.
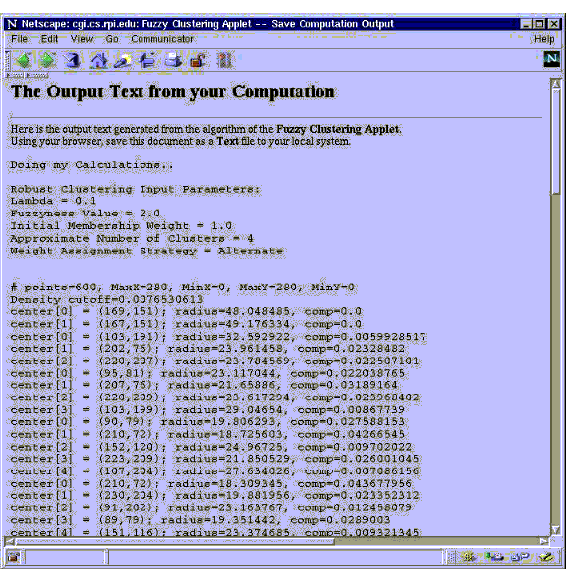 Figure 17. The Save Results
Screen
Figure 17. The Save Results
Screen
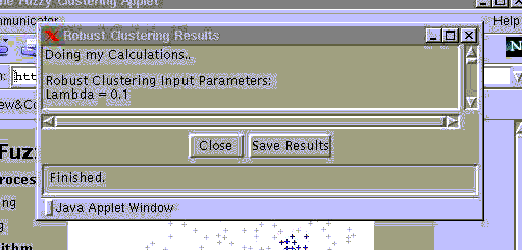 Figure 16. The Algorithm
Results Dialog (Finished)
Figure 16. The Algorithm
Results Dialog (Finished)
5.0 Saving the Data Points
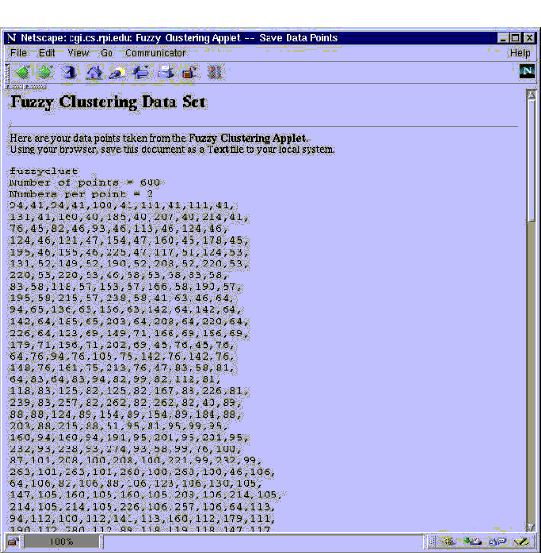 Figure 18. The Save Data
Points Screen
Figure 18. The Save Data
Points Screen
If you have entered data points on the canvas manually through clicking the mouse, you should save your changes. To save the data points select the Save Points button (see figure 2). The screen in figure 18 is similar to what you will see next. It is a new browser window in which the data points in the applet are exported. To complete the saving process, the user must select the save option from the browser's file menu, writing to local disk.
6.0 Removing Computed Shells and Clusters
To remove any algorithm's computations, be it circles or colored
clusters, the user just has to select the Clear Clusters
button (see figure 2).
7.0 Removing the Data Points
To delete all the data points in the applet simply select the
Clear Points button (see Figure 2). There are no warnings
issued with this option; it is absolute.
8.0 On Line Help
On line help is available as an HTML document that is loaded when the user presses the Help button (see figure 2). The help file will open in its own browser window.